In first part we saw how to create new VM in internal/private network now in this post we will see how to add external/public network to VM instance.
First check if our existing VM is in running state.

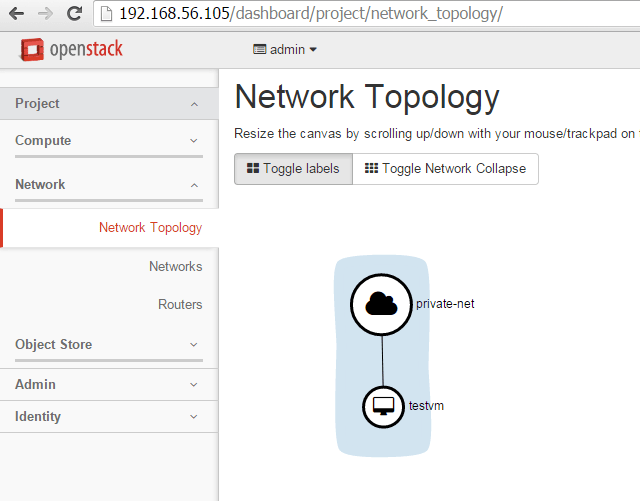
Now also check available network using CLI and using Openstack Dashboard.

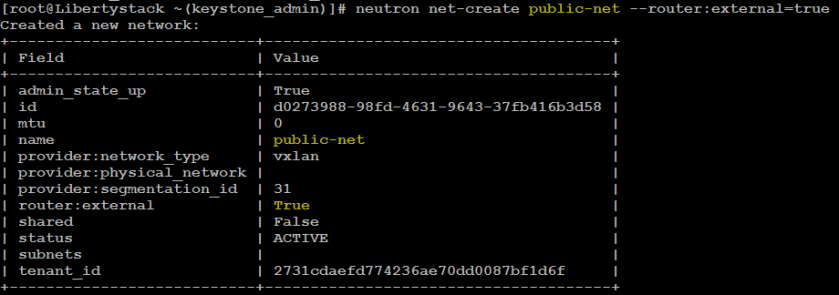
Now create external network public-net.
I am using external subnet address 192.168.122.0/24 with range start from 192.168.122.101 to 192.168.122.150 and gateway 192.168.122.1. I am not using DHCP.
Create external subnet public-subnet.

A Network topology view from Dashboard.
Now to connect internal network with external network we need router and set router’s gateway to external network to communicate outside world.
Create a router demo-router and set gateway to external network.
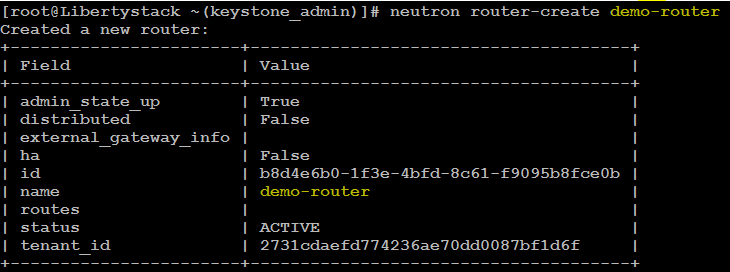

Check the router details.

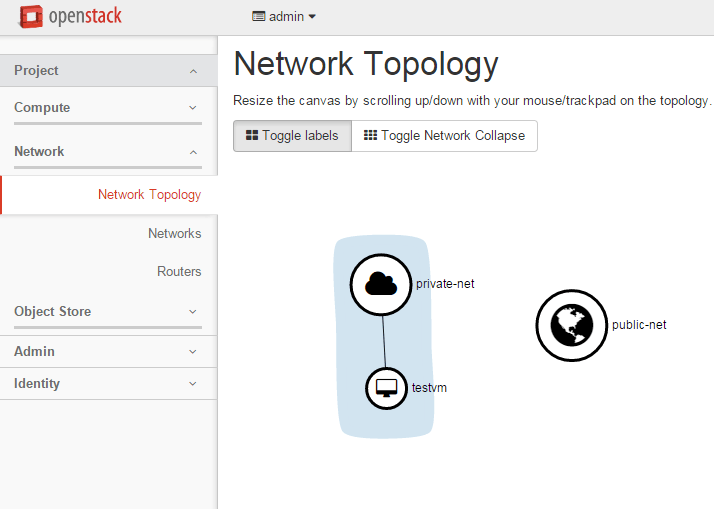
Now check the network topology view from dashboard.

You can see that internal and external network are connected through demo-router now.
Now we have to setup physical network connectivity.
Now as I have used Virtualbox I have to create one Host-only Network in Virtualbox and use that in Openstack VM to create/access external network. If you have external network ready you can use that instead.
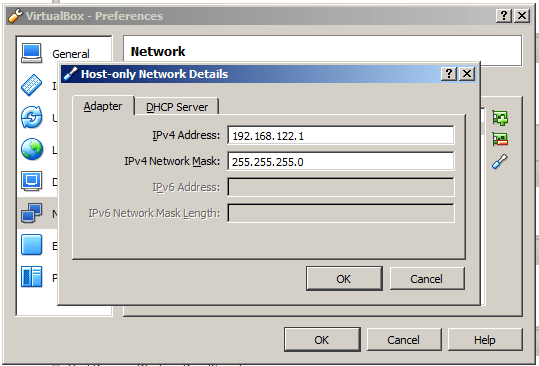
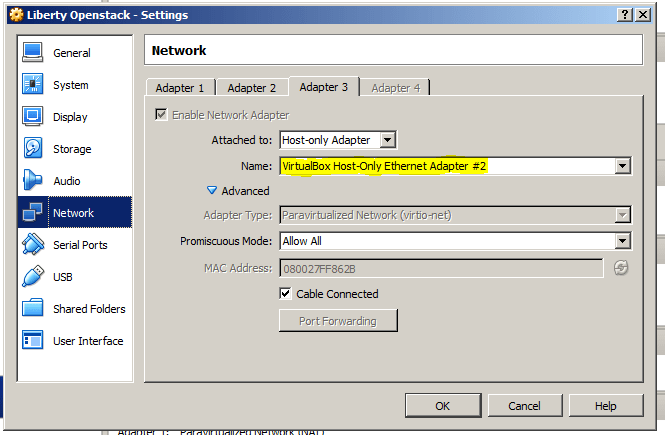
I have to add new interface eth2 into Openstack VM with 192.168.122.X series IP and use 192.168.122.1 as gateway IP to access outside world.
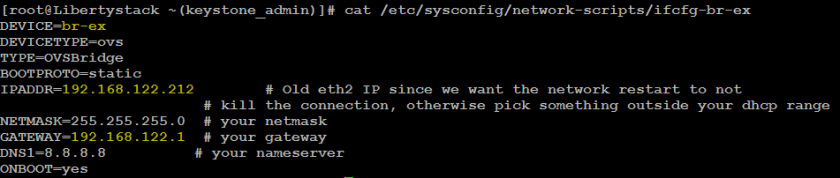
Again to work with OVS (Open Vswitch) we have to use external bridge br-ex for external access and need add our physical interface eth2 to external bridge br-ex as external port.
Create network bridge br-ex and eth2 network conf. files as below first.

Now add physical ethernet eth2 to external bridge br-ex

Check if it is added properly into external bridge br-ex.

Restart the network and check if br-ex is getting 192.168.122.212 IP address.

Now we need Floating/Public IP to access our testvm from outside world.
Create floating IP on external/public network and now associate it with vm testvm.

Floating IP 192.168.122.102 is created and associate this IP to testvm.

Floating IP is associated with testvm and now perform PING and SSH test on floating IP.
Note we have already created security rule for TCP and ICMP protocol in first part so we are not creating here.
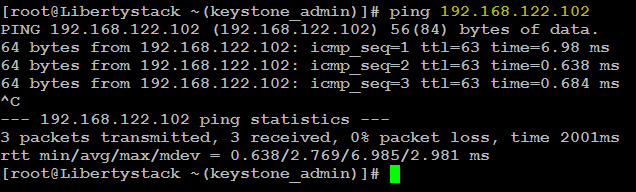

That’s it Floating/Public IP is working properly. Enjoy 🙂
